
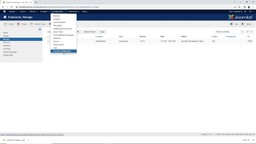
As you know as a website owner or developer, one of your key responsibilities is to ensure your content is accessible to everyone. The UserWay widget helps you fulfill that. This installation guide will walk you through the steps to install UserWay’s Joomla Accessibility widget on your website. Be sure to know which Joomla version you are using, as your installation instructions will vary based on the version. If you are unsure as to which Joomla version you have, log in to the backend of your website, go to “System,” and select “System Information.” This screen contains all the system information you may need, including the Joomla version currently running.
Joomla 3 Extension Installation Guide
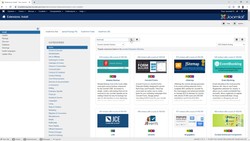
Step 1: Find and Install the UserWay Extension
In the Joomla control panel, go to the left navigation bar menu and scroll down to click on “Install Extensions.” On the page that opens, go to the tab at the top of the page and click “Install from Web.” In the search bar, type in “UserWay” and click on the magnifying glass on the screen or press “Enter” of “Return” on your keyboard.

The UserWay extension will appear on the screen. Click it, and scroll down to “Download” to download the file.

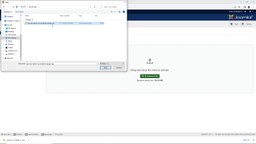
Go back to the top of the page and select the tab “Upload package file.” This will install the accessibility plugin file. Here, you will drag and drop the file into the large section on the page, or you can browse your computer to upload the file from there.
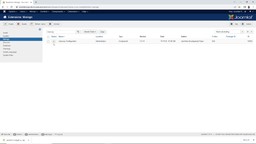
Step 2: Enable the UserWay Extension
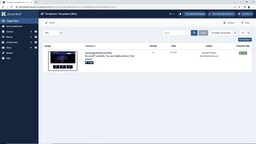
On the left navigation bar, select “Manage” and type “UserWay” in the query bar, and search for the extension.
You’ll either see a red “X”or a green checkmark in the list of items. You will likely see a green checkmark because the UserWay extension should be enabled by default. However, if you see a red “X”, click on the toggle switch to enable the UserWay extension and turn the red “X” into a green checkmark.
Step 3: Configure the UserWay Extension
To configure your UserWay extension, you’ll need to go to the top of the page and select “Components” from the navigation menu. Once you click it, select “UserWay Configuration” from the dropdown menu.
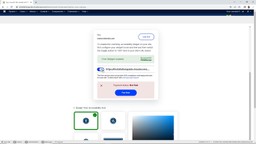
If this is the first time you’ve installed the UserWay widget, you will see a registration form. You can register for UserWay with your Google account or email address. Click on the “Next” button to progress.
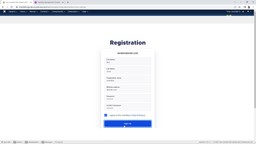
If you have already registered your website on UserWay.org, and click “Sign In.” after inputting your login credentials.
Step 4: Enable the UserWay Widget
Scroll down to the “On/Off” button and toggle it to enable UserWay’s Joomla plugin.
Here, you will be able to decide which widget features are right for your website. Consider upgrading to the more robust UserWay Pro-Widget, depending on your needs.
Step 5: Customize Your Widget
You’ll now have the opportunity to customize the size, color, and position of the UserWay widget button on your webpage. Don’t forget to save your edits by clicking “Save Settings” before leaving the customization page.
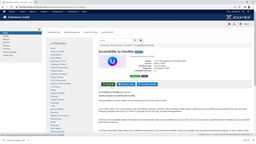
Step 6: Generate Your Accessibility Statement
At the top of the “Settings” page, look for the top menu that looks similar to a long oval. You will be in the “Your Widget” tab, but you’ll want to select the “Accessibility Statement” tab. Here, you can enter your information and click “Generate My Accessibility Statement.” Your statement will be sent to you immediately!
You can also look at the other tabs like “Report & Docs” and “Videos & Tutorials.” As always, for more information, head over to the UserWay website for more details on UserWay services.
Step 7: Preview Your Website
Preview your website and webpages to ensure your widget has been installed and working correctly.
Joomla 4 Manual Installation Guide
Step 1: Register Your Website and Get Your Unique Code snippet
Register your Joomla website with UserWay by going to UserWay.org and clicking on the “Start Free Trial” button at the top right corner. You will be taken through a list of steps to complete the registration process. You can register with your Google account or email address.
Copy your unique code snippet to your clipboard or save it as a text file. We will also email it to you in your welcome email. Find more information on how to get your unique code snippet at UserWay’s “Get Your Unique Code” blog post.
If you have already registered a website with UserWay, you will use the same unique code, and you can add your new website to your list.
Step 2: Add Your Unique Code to Your Website’s Code in Joomla
On the Joomla website, click on the “System” button on your dashboard’s left navigation bar. On the next page, click “Site Templates,” which will bring up your website’s template settings. Click on the name of the template. Look for “index.php” on the left-side navigation bar, and select it.
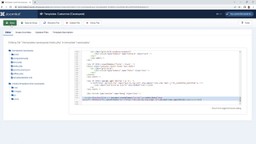
On the next page, you will see your website’s code. Scroll to the end of the code to find the body-closing tag. Place your cursor on the “</body>” tag and press “Enter” on your keyboard several times. Right-click your mouse or trackpad in one of the new lines and select “Paste” from the dropdown menu.
To save this, click on the green “Save” button at the top left of the page.
Step 3: Preview Your Website
Don’t forget to preview your website to ensure that you correctly made your changes and that the UserWay widget works.
Step 4: Customize your widget
To customize your widget options, you can log in two different ways. You can either sign in directly through your widget or by going to manage.userway.org to get into your dashboard.
All your widget customization options can be made at either location, allowing you to change the size, position, and color of your widget icon.
If your website requires more accessibility options, you can also upgrade to the UserWay Pro Widget.


