
Enhancing the accessibility of your Moodle website will allow all users to access your content, and this can be achieved with UserWay’s AI-Powered Accessibility Solution. This installation guide will show you how to quickly install UserWay’s Moodle widget to increase your Moodle accessibility.
Step 1: Register Your Moodle Website with UserWay
The first step is to register your Moodle website by clicking on the “Start Free Trial” button at the top right of the UserWay homepage. To receive your unique code snippet, follow all the registration steps. You can copy the text to your clipboard, or save it as a text file.
The unique code can also be found in the welcome email you received when registering your website with UserWay.
There’s no need to re-register if you’ve already registered a website with UserWay. Just add the new website to your list and use the same unique code you used with your previous website.
To find your code, check your welcome email or log into your UserWay dashboard and click on “My Embed Script” in the top right menu. Here, you will find your unique code, which you can copy and paste into your site to get your Moodle plugin.
If you have trouble signing into your UserWay dashboard, your login credentials can be found in your welcome email sent to you upon registration.
Step 2: Install UserWay’s Moodle Widget
You will now begin installing the Moodle widget. On the top navigation menu, move your mouse to the left and click “Site Administration.”
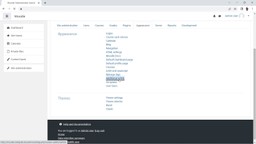
You will be prompted to a new page. Below the page title, you will see some tabs. Click on the “Appearance” tab, scroll down through the links in the Appearance section and select the “Additional HTML” text link.

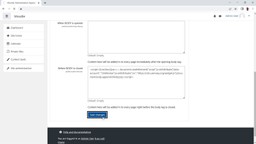
In the resulting page, scroll down past the first few text fields until you find the “Before BODY is Closed” text field. Paste your unique code in that field. It should be empty. Click on the “Save Changes” button below the text field.
Step 3: Preview, Publish, and Customize Your Moodle Accessibility Widget
You can now preview your Moodle website to ensure the widget is installed and working correctly. Remember to upload your site to your server to ensure your changes are effective and live.
In addition, you can customize your Moodle accessibility widget by signing in directly through your widget or by going to UserWay.org. Customization options are available in either place.
You may also want to consider the UserWay Pro Widget for more extensive accessibility and compliance options.


