If you are interested in increasing your Squarespace ADA compliance, consider UserWay’s AI-Powered Accessibility Solution. This step-by-step guide will help you install your Squarespace accessibility widget, allowing more users to access your Squarespace website’s content �– regardless of their ability.
Step 1: Register Your Squarespace Website with UserWay
The first step is registering your Squarespace website at Userway. To start your free trial and receive your exclusive code snippet, click on the “Start Free Trial” button located at the upper right corner of the homepage. Complete all registration steps to acquire the code which can be copied to your clipboard, or saved as a text file.
Your unique code snippet is essential for the operation of UserWay on your website. It can be found in the welcome email that was sent to you upon registration.
If you have already registered a website with UserWay, there’s no need to repeat the registration process. Simply add the new website to your registered list and utilize the same code that you used for the previous website.
To locate your unique code, you can refer to the welcome email that was sent to you upon registration, or simply log into your UserWay dashboard and select the “My Embed Script” option from the top right menu. There you will find your unique code, which you can copy and paste into your site to get your Squarespace accessibility plugin.
If you encounter any difficulty accessing your UserWay dashboard, your login information can be retrieved from the welcome email that was sent to you upon registration.
Step 2: Paste Your Code in the Footer Section
Next, here’s how you can paste your code. On the left-hand side of your Squarespace website dashboard, go to “Settings,” scroll down to the bottom, and click “Advanced.” Next, click the third option down from the top, “Code Injection.”
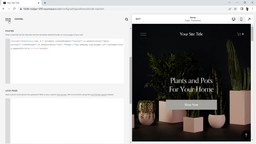
Scroll down the page and paste your code in the “Footer” text field. After pasting your code in the “Footer” text field, click the “Save” link.
Step 3: Preview, Publish, and Customize Your Squarespace Widget
You’re all set! You can now publish your Squarespace website to implement the changes from the Squarespace accessibility plugin after ensuring it works correctly.
You can customize your Squarespace widget via the widget itself or by going to your UserWay dashboard. You can access the available customization options for enhanced Squarespace accessibility. Remember to click “Save Settings” before leaving the icon customization area.
Alternatively, if your website requires more accessibility features, consider the UserWay Pro Widget to better suit your needs.


